
Andee Layne's Blog

The Honeybee
SLIDER

The Sweetest Thing

a Beauty & Style blog
Ashley Fleming's Blog

Fitness and Health
KENDI everyday

A style blog

Thursday, June 12, 2014
New Site: Redirect
Please visit: http://cest-la-mode.net/quirkysweet/ for the new website, this site is no longer active.
Monday, November 18, 2013
It's a Scarf kinda day ...
There is such a thing as the "perfect" scarf. No matter the weather, there is always a way to wear and combine a scarf to your outfit. My favorite - universal scarves... Also known as "uni" scarves. Below are a few of my favorite scarves found on various sites.
Scarf 1:

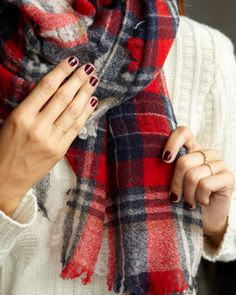


Scarf 1:

Find this scarf here: C. Wonder
Scarf 2:

Find this scarf here: Madewell
Scarf 3:

Find this scarf here: unknown
Scarf 4:
Find this scarf here: Subtle Luxury
Scarf 5:
Find this scarf here: Zara
Scarf 6:
Find this scarf here: Student Rate
Scarf 7:
Find this scarf at: unknown
Sunday, November 10, 2013
Recipe: Strawberry Basil Sangria
This wonderful receipt came from http://www.mnn.com/food/beverages/stories/recipe-strawberry-basil-sangria. Please enjoy!
Made with Cline Cellar's Cool Climate Chardonnay, this sangria is crisp and refreshing. I added basil to this recipe for a few reasons but mostly to give the drink a clean finish. And unlike most sangria, where the recipe is designed to cover up bad wine, this is quite the opposite. It was designed to showcase it. Enjoy!
Made with Cline Cellar's Cool Climate Chardonnay, this sangria is crisp and refreshing. I added basil to this recipe for a few reasons but mostly to give the drink a clean finish. And unlike most sangria, where the recipe is designed to cover up bad wine, this is quite the opposite. It was designed to showcase it. Enjoy!
Prep time: 5 minutes
Total time: 15 minutes

Yield: 1 pitcher
Strawberry Basil Sangria
Ingredients
- 1/2 pound fresh strawberries
- 1 apple
- 1 ounce fresh whole basil leaves
- 1 bottle Cline Cellar Cool Climate Chardonnay
- 1/2 cup organic sugar
- 1 cup club soda
- 1 cup white grape juice
Cooking directions
- Trim and thinly slice the strawberries.
- Slice and dice the apple into very small bits.
- Score the basil leaves with a fork. I did this instead of cutting the leaves into strips as I did not want my guests choking on basil while trying to enjoy this drink. Just rub the basil leaves gently with a fork in order to release their flavor in the sangria.
- Layer the fruit, sugar and basil in a large pitcher and let sit for about 10 minutes. This is just to let the sugar absorb the juices from the basil and the fruit. You'll see it turn a bit red.
- Add the club soda first and then the remaining liquids. Stir well and serve.
Sunday, November 3, 2013
Fall Fashion
The leaves have changed and you know what that means - FALL! Better yet - Fall Fashion. I love this type of weather. Not too hot, not too cold (just yet.) Below are some styles put together for fall that I adore!


Fur, navy, white, tan --> check out
Sunday, June 2, 2013
Welcome our newest member, Bear!
Over the weekend I took a trip to Chicago to visit a friend named Jenny. During our girls weekend, my boyfriend - Jake sent me a picture of the dog, Bear we had spent some time with and were looking to take once we moved into our new house. I was shocked! In the background was my coffee table, my coasters, and basically noticing it was MY place! I was like "JAKE?!! Do we have the dog, now?" He couldn't get out of this one :) He was going to surprise me when I got home with Bear but accidentally sent me the picture of him at our apartment. Super excited and super thrilled! How sweet is my boyfriend? We'll be moving into the new house 4th of July weekend and with our newest family member! Life has a funny way of turning around.

Welcome, Bear!

Tuesday, May 28, 2013
Chicago!
This weekend I get to go to Chicago for a girls weekend. A weekend full of bikinis, ladies, and girly drinks talking about girly things! Cannot wait to see my lovely ladies in Chicago! Is it Friday yet?
Memorial Day Weekend Crafts
Phew.
What.A.Weekend.
I was busy ALL weekend with 'memorial day' plans. This weekend was the weekend of Carb Day and the INDY 500 - two traditions here in Indianapolis that our friends and I attend. Not only did we have a fun and busy time with the race weekend but also being able to take my boyfriends sisters kids out to go fishing and cooking out with the family. Over the weekend I wanted to be a little "different" so I made a few headbands.
The first headband I made was the floral headband that I wore to carb day. As you can see below, it's super cute and really easy to make. I went to WalMart and purchased $3 dollars worth of flowers (4 in all). Next I pulled out my hot glue gun, my thread and needle, and an old white headband that I used to wear running.
Step 1:
Get your supplies you'll need in order to make the headband. Plain headband, the flowers purchased, matching thread and needle, scissors, hot glue, and hot glue gun.

Step 2:
Lay the headband flat on one side. Place one flower at a time and gradually sew the middle part of the flower onto the headband. After sewing each flower to the headband, spreading them apart as far away as needed so they do not clutter or do not stretch too far apart, start to hot glue the area where you sewed. This will ensure they won't fall out as well as make them more durable to hold in one particular spot.

Step 3:
ENJOY YOUR NEW HEADBAND!!!

I also made a custom American Flag headband, not as great of quality as the floral because it was much harder to make but I wanted to display the final piece that I made for my friend Darci.

What.A.Weekend.
I was busy ALL weekend with 'memorial day' plans. This weekend was the weekend of Carb Day and the INDY 500 - two traditions here in Indianapolis that our friends and I attend. Not only did we have a fun and busy time with the race weekend but also being able to take my boyfriends sisters kids out to go fishing and cooking out with the family. Over the weekend I wanted to be a little "different" so I made a few headbands.
The first headband I made was the floral headband that I wore to carb day. As you can see below, it's super cute and really easy to make. I went to WalMart and purchased $3 dollars worth of flowers (4 in all). Next I pulled out my hot glue gun, my thread and needle, and an old white headband that I used to wear running.
Step 1:
Get your supplies you'll need in order to make the headband. Plain headband, the flowers purchased, matching thread and needle, scissors, hot glue, and hot glue gun.
Step 2:
Lay the headband flat on one side. Place one flower at a time and gradually sew the middle part of the flower onto the headband. After sewing each flower to the headband, spreading them apart as far away as needed so they do not clutter or do not stretch too far apart, start to hot glue the area where you sewed. This will ensure they won't fall out as well as make them more durable to hold in one particular spot.
Step 3:
ENJOY YOUR NEW HEADBAND!!!
I also made a custom American Flag headband, not as great of quality as the floral because it was much harder to make but I wanted to display the final piece that I made for my friend Darci.
Wednesday, May 22, 2013
PaleOMG - For all my Paleo Dieters
This girl has an amazing blog full of yummy recipes! Not only are they healthy and full of nutrition but she's also added in some for the hard to please. Not because we are literally hard to please but because if you are doing Paleo or any other diet, you know how hard it is to stick with it. {Lack of options}


 5-Ingredient Avocado Pudding
Prep time: 3 mins Total time: 3 mins
Serves: 1
Ingredients
½ avocado, mashed
1-2 tablespoons unsweetened cocoa powder (the more, the chocolatey-er)
2 teaspoons raw honey
1 teaspoon sunbutter (or other nut butter)
pinch of salt
dark chocolate chips-optional
Instructions
Mash up your avocado.
Add in your cocoa powder, raw honey, sunbutter, pinch of salt and mix thoroughly.
Top with dark chocolate chips if you would like. I liked.
Eat it up!
**if you want to go over the top it chocolatey flavor and give your pudding a protein boost, add a tablespoon of Simply Pure Nutrients Recovery Fuel
Notes
For an even creamier texture, puree in your food processor.

Chicken Tortilla Soup
Prep time: 30 mins Cook time: 30 mins Total time: 1 hour
Serves: 6-8
Ingredients
For your chicken
3-4 large boneless, skinless chicken breasts (about 2.5lbs worth)
1 tablespoon cumin
2 teaspoons cayenne pepper
2 teaspoons garlic powder
salt and pepper, to taste
1 tablespoon olive oil
For your soup
2 tablespoons olive oil
2 garlic cloves, minced
1 yellow onion, diced
1 red bell pepper, diced
1 poblano pepper, diced
1 jalapeño, finely diced
1 (4oz) can diced green chiles
1 (14oz) can fire roasted tomatoes
2 teaspoons cumin
1 teaspoon chili powder
1 teaspoon garlic powder
salt and pepper, to taste
32 oz fluid chicken stock (I used low sodium, no sugar added)
juice of 2 limes
chopped cilantro, to garnish
crushed plantain chips, to garnish
sliced avocado, to garnish
Instructions
Preheat oven to 375 degrees.
Place chicken on a parchment lined baking sheet. Pour on some olive oil and then sprinkle with cumin, cayenne pepper, garlic powder, and salt and pepper.
Bake for 20-30 minutes (depending on the thickness of the chicken breasts). Once your chicken is done baking, use two fork to shred the chicken.
While your chicken is baking, get your soup ready. Heat 2 tablespoons of olive oil in a large pot over medium-high heat then add your minced garlic.
Add onions, red bell pepper, jalapeño pepper, and poblano pepper. Mix around to help coat. Once your onions begin to become translucent, pour in your green chiles and diced fire roasted tomatoes, along with the rest of your spices. Mix together.
Then add your shredded chicken and chicken stock to the pot.
Simmer on low heat for 30 minutes.
When your soup has simmered, add in your lime juice and a bit more salt and pepper.
Add your soup to a bowl along with avocado, cilantro, and plantain chips.
Stay warm. Being cold is stupid.

Roasted Red Pepper and Avocado Soup with Sausages
Prep time: 10 mins Cook time: 10 mins Total time: 20 mins
Serves: 3-4
Ingredients
3-4 roasted red peppers, roughly chopped (I used jarred in water kind. but you could roast your own)
1 avocado, pitted
1 yellow onion, diced
3 garlic cloves, minced
1 cup canned coconut milk
1 cup vegetable broth
½ lime, juiced
1 tablespoon smoked paprika
1 tablespoon paprika
1 teaspoon red pepper flakes
1 teaspoon dried oregano
2-3 tablespoons fat of choice (I used bacon fat)
salt and pepper, to taste
½ avocado, diced (to garnish)
chopped cilantro (to garnish)
4-5 cooked sausage of choice (I used a sundried tomato chicken sausage)
Instructions
Place a saucepan over medium heat, add in your fat, garlic and onion. Cook up onions until they are translucent.
Then add in your roasted red peppers with broth and coconut milk along with your smoked paprika, paprika, red pepper flakes, oregano, and salt and pepper. Let simmer for 8-10 minutes.
While soup is simmering, slice up your sausages and cook on a skillet on both sides.
Once everything has simmered, scoop out your avocado and add to the saucepan along with your lime juice. Then use an immersion blender to mix until soup is smooth and creamy. If you don’t have an immersion blender, add it to your food processor, like I did. I did it in two batches so my kitchen wouldn’t become messier than it already is.
Top soup with diced avocado, chopped cilantro, and sausage. So divine.
Notes
use ALL the garnishes. they really do make a huge difference in flavor. do not cheat your tastebuds.

Prep time: 3 mins Total time: 3 mins
Serves: 1
Ingredients
½ avocado, mashed
1-2 tablespoons unsweetened cocoa powder (the more, the chocolatey-er)
2 teaspoons raw honey
1 teaspoon sunbutter (or other nut butter)
pinch of salt
dark chocolate chips-optional
Instructions
Mash up your avocado.
Add in your cocoa powder, raw honey, sunbutter, pinch of salt and mix thoroughly.
Top with dark chocolate chips if you would like. I liked.
Eat it up!
**if you want to go over the top it chocolatey flavor and give your pudding a protein boost, add a tablespoon of Simply Pure Nutrients Recovery Fuel
Notes
For an even creamier texture, puree in your food processor.
Wednesday, May 15, 2013
DIY: How to Ombré Your Own Hair
A cheaper way to getting the hair your want.
Ever since my love of fashion, hair, make-up, etc came to be a big part of my life, I have always been a "self taught" beautician. I don't like to spend loads of money on things I want so I achieve them in my own way. Today I am going to teach everyone how to Ombré their hair without going to a salon. *NOTE* it is much easier to Ombré extensions then it is your real hair unless your hair is a) long enough to do it by yourself or b) you have someone there.

Step 1
Deciding What's Best
First, you'll need to make sure you buy a lighter extension color then your hair or what you're planning on your hair color to be. It's much easier to go darker --> lighter then lighter --> light. It's possible to dye blonde to blonde but trickier. As you can see from the picture on the right I have medium blonde hair. The extensions I bought are 'honey blonde'. These extensions came from Foxy Locks Extensions (out of the UK) and are 160g (the higher the # of grams the thicker the hair will be). I have bought extensions from Pro Extensions as well but would not recommend them over Foxy Locks. [Begin opinion] Psttt- the price for foxy locks is cheaper than pro extensions and Foxy Locks are also longer and thicker [end opinion] Buying lighter extensions will help with the finished product.
Pre-steps to think about ...
1) Pick out the color of extensions you want: I would recommend them being lighter than your natural hair color for a more dramatic ombré look.
2) Decide how much color you want at the bottom before dying.
3) Make sure to dye them in the order of how you'll be clipping them in your hair. You don't want the color to be uneven at the bottom.
Step 2

Get Ready to Dye!
Prepare your hair dye and your extensions. There is always instructions on the box of how to blend your hair dye. Whether or not you buy it from a box or mix it yourself with professional supplies from Sally's, etc. this preparation will be done in the same manner. I use a box, so I'll put product 1 in product 2 and shake until blended. I use L'Oréal 7 1/2 A: Excellence Creme which is about $6.99 at any CVS, Walgreen's, etc.
You will need:
1) Your hair dye
2) A dye brush (I don't recommend using the provided bottle)
3) Foil
4) Gloves
Next, lay all of your extensions out on a strip of foil. It doesn't matter what side you start with, we'll be flipping them once the first side is complete. You're going to want to make sure that you put a lot of hair dye on the "root" of the extensions. This will ensure we cover up the blonde on the top. Displayed in the picture to the right, make sure to coat the top of the hair with a lot of hair dye - I ended up using two hair kits. When taking your brush and slowly moving the color down, make sure you're not putting too much near the bottom. To get the fade that the ombré hairstyle needs in order to look correct, lightly using your brush - take small strokes down into the blonde until the color fades naturally off of the brush. This will ensure a great transition of color. Now you're ready to flip the hair over to the other side and repeat step 2's coloring instructions. ***Make sure to fill any spots that are blonde near the top!!! If you do not do this, it will be splotchy***
I would also suggest leaving a little "left over dye." After you wash your extensions you may need a little bit to correct splotch spots, etc.
Step 3

Washing and Drying
This step is also very important. Never wash your extensions in a none balanced PH shampoo
[Why? .... Since the goal is to keep the shampoo slightly acid, the term "pH balanced" is actually a misnomer. We want the balance to be tipped slightly to the acidic side. read more]
Make sure to be gentle with the hair while washing it. Even if you can treat it like normal hair, you're washing hair that will never produce grease and chemicals to keep it from breaking and staying healthy so a little caution is suggested.
I do not blow dry my extensions. To avoid damage and tangle, I lay my extensions out on a towel and place a fan next to them to air dry. This ensures that I cause little to no damage to the wet hair.
Step 4
the Final Product
Ta-Da! See the picture below for the final product.

Hair Dye:L'Oréal 7 1/2 A: Excellence Creme. Medium Ash Blonde.
Extensions: Foxylockextensions.com: Color #22 "honey blonde" 160g 'Deluxe'
Ever since my love of fashion, hair, make-up, etc came to be a big part of my life, I have always been a "self taught" beautician. I don't like to spend loads of money on things I want so I achieve them in my own way. Today I am going to teach everyone how to Ombré their hair without going to a salon. *NOTE* it is much easier to Ombré extensions then it is your real hair unless your hair is a) long enough to do it by yourself or b) you have someone there.
Step 1
Deciding What's Best
First, you'll need to make sure you buy a lighter extension color then your hair or what you're planning on your hair color to be. It's much easier to go darker --> lighter then lighter --> light. It's possible to dye blonde to blonde but trickier. As you can see from the picture on the right I have medium blonde hair. The extensions I bought are 'honey blonde'. These extensions came from Foxy Locks Extensions (out of the UK) and are 160g (the higher the # of grams the thicker the hair will be). I have bought extensions from Pro Extensions as well but would not recommend them over Foxy Locks. [Begin opinion] Psttt- the price for foxy locks is cheaper than pro extensions and Foxy Locks are also longer and thicker [end opinion] Buying lighter extensions will help with the finished product.
Pre-steps to think about ...
1) Pick out the color of extensions you want: I would recommend them being lighter than your natural hair color for a more dramatic ombré look.
2) Decide how much color you want at the bottom before dying.
3) Make sure to dye them in the order of how you'll be clipping them in your hair. You don't want the color to be uneven at the bottom.
Step 2
Get Ready to Dye!
Prepare your hair dye and your extensions. There is always instructions on the box of how to blend your hair dye. Whether or not you buy it from a box or mix it yourself with professional supplies from Sally's, etc. this preparation will be done in the same manner. I use a box, so I'll put product 1 in product 2 and shake until blended. I use L'Oréal 7 1/2 A: Excellence Creme which is about $6.99 at any CVS, Walgreen's, etc.
You will need:
1) Your hair dye
2) A dye brush (I don't recommend using the provided bottle)
3) Foil
4) Gloves
Next, lay all of your extensions out on a strip of foil. It doesn't matter what side you start with, we'll be flipping them once the first side is complete. You're going to want to make sure that you put a lot of hair dye on the "root" of the extensions. This will ensure we cover up the blonde on the top. Displayed in the picture to the right, make sure to coat the top of the hair with a lot of hair dye - I ended up using two hair kits. When taking your brush and slowly moving the color down, make sure you're not putting too much near the bottom. To get the fade that the ombré hairstyle needs in order to look correct, lightly using your brush - take small strokes down into the blonde until the color fades naturally off of the brush. This will ensure a great transition of color. Now you're ready to flip the hair over to the other side and repeat step 2's coloring instructions. ***Make sure to fill any spots that are blonde near the top!!! If you do not do this, it will be splotchy***
I would also suggest leaving a little "left over dye." After you wash your extensions you may need a little bit to correct splotch spots, etc.
Step 3
Washing and Drying
This step is also very important. Never wash your extensions in a none balanced PH shampoo
[Why? .... Since the goal is to keep the shampoo slightly acid, the term "pH balanced" is actually a misnomer. We want the balance to be tipped slightly to the acidic side. read more]
Make sure to be gentle with the hair while washing it. Even if you can treat it like normal hair, you're washing hair that will never produce grease and chemicals to keep it from breaking and staying healthy so a little caution is suggested.
I do not blow dry my extensions. To avoid damage and tangle, I lay my extensions out on a towel and place a fan next to them to air dry. This ensures that I cause little to no damage to the wet hair.
Step 4
the Final Product
Ta-Da! See the picture below for the final product.
Hair Dye:L'Oréal 7 1/2 A: Excellence Creme. Medium Ash Blonde.
Extensions: Foxylockextensions.com: Color #22 "honey blonde" 160g 'Deluxe'
the Bubble Fad - JCrew Fakes
I don't care how many people say "why would you buy a knock off of something? Just buy the real thing!" or "I hate it when people wear the JCrew rip off necklaces, how tacky are you?" I'm sorry but not everyone is rich/not everyone has enough disposable income to spend money on clothes.

I have always been a 'bargain shopper' or a 'cheap' shopper. I'm not one who needs the next best thing, and if I do I make sure to find it cheap or on sale. Lately my craze for these rip off JCrew bubble necklaces has gone off the charts! I absolutely love the way they make an outfit pop with a burst of color. I have many chunky necklaces and jewelry but these necklaces top it off. They're so unique, regardless of how many people own them and wear them or if you're caught at a party and two other girls are also wearing the same necklace - the reason why I still call them unique even after that is because they come in a variety of colors; shades of colors. Buy a yellow one and you can get it in three other shades! That and being creative with outfits makes it a really unique piece that I would advise every girl to have in her wardrobe.
Bubble Necklaces: charlotterusse.com
Bubble Necklaces: shopsosie.com
Bubble Necklaces: (in any color) etsy.com (Search: Bubble Necklace)
replica JCrew bubble necklace
Bubble Necklaces: charlotterusse.com
Bubble Necklaces: shopsosie.com
Bubble Necklaces: (in any color) etsy.com (Search: Bubble Necklace)
Summery, Colorfuly, Fun Outfits
Peach Color and Lace
Lace, lace, lace. Peach, peach, peach! Who could go wrong with these two together? Here is a beautiful dress that can be found in multiple colors. The one displayed below is a peach/black lace dress that ties with an open back. I have this dress in all mint as well; form fitted, that I will have to post later.
 This outfit is good look for a wedding look or perhaps a fancy dinner date. Peach and lace can make a sexy and elegant combo!!!
Black Lace and Peach dress: Tobi.com
Black cotton shoes: Plato's Closet - $5.00
Mint Color and Lace
It seems that the craze this summer for girls my age is the color mint. Now don't get me wrong, I love- love- love this color! But not a lot of companies are producing the correct attire in this beautiful mint color. However, do not fear! I found a wonderful site full of awesome mints, pinks, yellows, and more!
 This outfit is good look for a wedding look or perhaps a fancy dinner date. Mint is a great color for any outfit!
Mint dress: Tobi.com
Copper necklase: Premier Jewelry
Brown shoes: Platos Closet $5:00
 This outfit is good look for a casual lunch/dinner date. Add heals and a great look for a night out with the girls. Lace has always been "in style" but recently it's blown up in the fashion market!
Yellow flowy long sleeved shirt: Tobi.com
High wasted Turquoise lace shorts: Tobi.com
Leaf coral earings: Body Central $3.00
Colorful beaded flip-flops: Charlotte Russe
Pink crossed tank - High waisted skirt
Short tanks/shirts are definitely in! Whether or not they're worn with something high waisted or not. The look I went for was a short crossed tank with a high waisted skirt. This look would also be cute with high waisted shorts or a hippy type look! :)
 This outfit is good look for a night out on the waterfront or even a casual lunch outing.
Pink short, strappy top: Tobi.com
Brown long high waisted skirt: forever21.com
 This outfit is good look for a movie night, a casual outting to a bar or work event. Leopard jacket adds some pop with the foam green shoes.
Orange/Purple closed toe shoes: Tobi.com
Foam green shoes: Tobi.com
Leopard jacket: charolletrusse.com
Yellow Sleeved dress - Orange Pop
This yellow is brilliant for the summer time! Although it has sleeves, this dress is light weight and provides a comfy feel all around. Because this dress is solid, I added some brown/orange strappy wedges and an orange and yellow necklace to add a pop of color to the outfit. Adding little things like that can make the difference in an outfit. This could also be worn with a small high waisted belt. I wore this to a bachelorette party but it could be worn on a date or even a wedding.
 This outfit is good look for a night out on the waterfront or even a casual lunch outing.
Yellow dress: Tobi.com
Brown / Orange shoes: charlotterusse.com
Yellow / Orange necklase: Francescas
Lace, lace, lace. Peach, peach, peach! Who could go wrong with these two together? Here is a beautiful dress that can be found in multiple colors. The one displayed below is a peach/black lace dress that ties with an open back. I have this dress in all mint as well; form fitted, that I will have to post later.
Black Lace and Peach dress: Tobi.com
Black cotton shoes: Plato's Closet - $5.00
Mint Color and Lace
It seems that the craze this summer for girls my age is the color mint. Now don't get me wrong, I love- love- love this color! But not a lot of companies are producing the correct attire in this beautiful mint color. However, do not fear! I found a wonderful site full of awesome mints, pinks, yellows, and more!
Mint dress: Tobi.com
Copper necklase: Premier Jewelry
Brown shoes: Platos Closet $5:00
Yellow flowy long sleeved shirt: Tobi.com
High wasted Turquoise lace shorts: Tobi.com
Leaf coral earings: Body Central $3.00
Colorful beaded flip-flops: Charlotte Russe
Pink crossed tank - High waisted skirt
Short tanks/shirts are definitely in! Whether or not they're worn with something high waisted or not. The look I went for was a short crossed tank with a high waisted skirt. This look would also be cute with high waisted shorts or a hippy type look! :)
Pink short, strappy top: Tobi.com
Brown long high waisted skirt: forever21.com
Orange/Purple closed toe shoes: Tobi.com
Foam green shoes: Tobi.com
Leopard jacket: charolletrusse.com
Yellow Sleeved dress - Orange Pop
This yellow is brilliant for the summer time! Although it has sleeves, this dress is light weight and provides a comfy feel all around. Because this dress is solid, I added some brown/orange strappy wedges and an orange and yellow necklace to add a pop of color to the outfit. Adding little things like that can make the difference in an outfit. This could also be worn with a small high waisted belt. I wore this to a bachelorette party but it could be worn on a date or even a wedding.
Yellow dress: Tobi.com
Brown / Orange shoes: charlotterusse.com
Yellow / Orange necklase: Francescas
Subscribe to:
Posts (Atom)